As an Amazon Associate we earn from qualifying purchases. Some brands also pay us when you click or buy, so those links are ads. Full disclosure below
To prevent ice dams, stop the house's heat from reaching the roof. Seal the air leaks in the attic floor first, then bring the attic insulation up to the ENERGY STAR level for your climate zone, and keep the soffit vents open. That is the order University of Minnesota Extension gives (an airtight ceiling first, then more insulation), and it is the fix that removes the cause. Everything else is a stopgap that treats the symptom: raking the roof after each storm, clearing the gutters, and heat cable along the eave where the ice comes back every winter.
Water coming in right now? Move your belongings out of the way and start drying. If you can reach the roof edge safely from the ground, open a channel through the dam with tap water on a warm day or a nylon stocking filled with calcium chloride ice melt; never use rock salt, and never hack at the ice. If you cannot reach it safely, hire an ice dam removal service that uses steamers. Details and sources below.
If you just need a roof rake, our roof rake guide works out how far each rake reaches on a one or two-story house. Every step here comes from the extension service, building scientists, government programs, insurers and cable makers we name, and where they disagree, we say so and say which way we lean. We did not test the methods ourselves.
What causes ice dams?
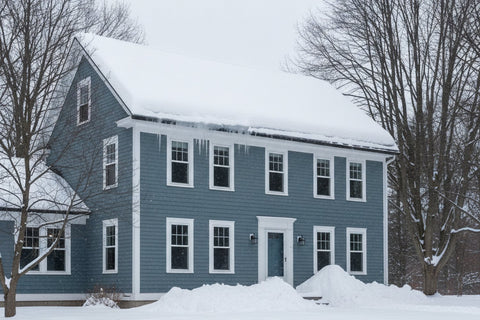
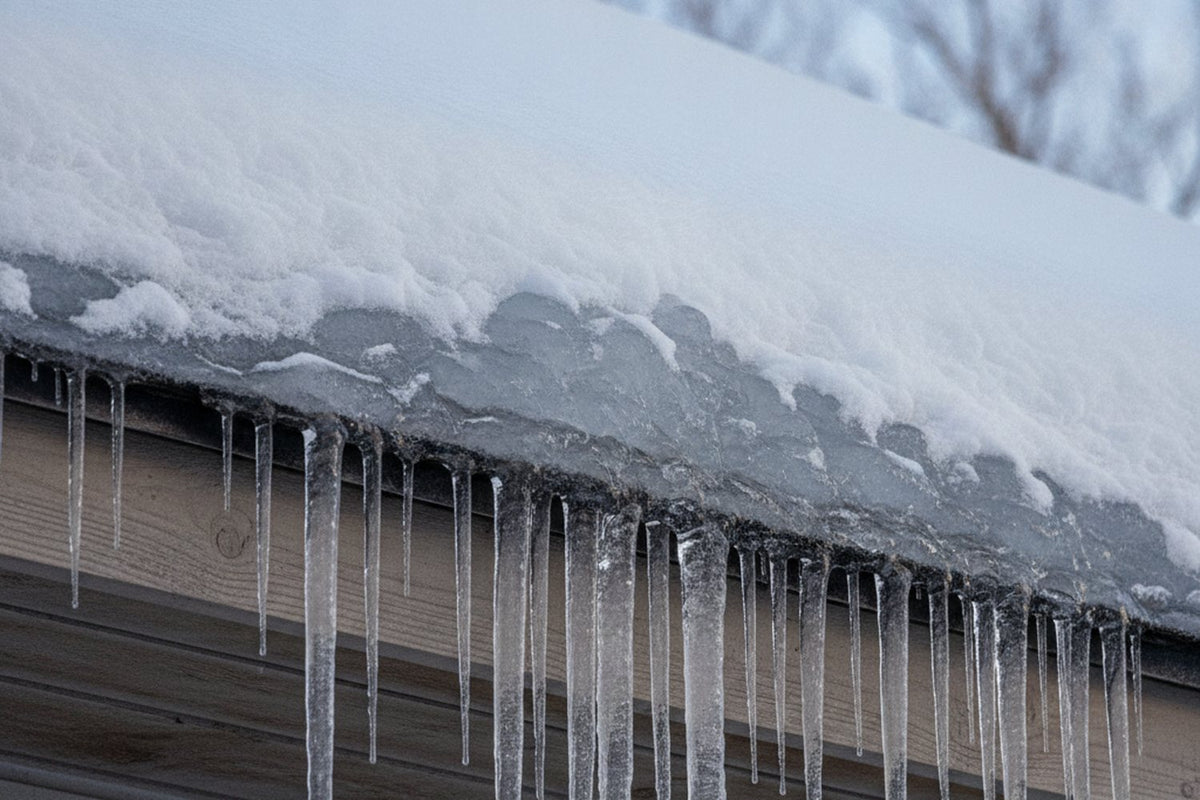
An ice dam is a ridge of ice that forms at the edge of a roof and stops melting snow from draining off, in University of Minnesota Extension's definition. Building Science Corporation lists three conditions that have to be present at once: an outside temperature below freezing, a roof deck above freezing, and snow on the roof. Meltwater runs down to the eave, which sticks out past the heated walls and stays cold, and freezes there; water pools behind the ridge and works under the shingles into the attic, walls and ceilings.
The heat comes mostly from the house. UMN Extension says it is primarily heat flowing from the house that warms the roof unevenly, and that in many homes air leakage (warm air rising through gaps in the ceiling, around light fixtures and other openings) is the major way that heat gets into the attic. Thin insulation, chimneys, leaky ductwork and exhaust that ends just above the roof add to it, and Building Science Corporation notes that uneven solar melting can dam even properly built roofs.
Gutters are not the cause. Steve Kuhl, owner and CEO of the Ice Dam Company and Radiant Solutions Company, interviewed in Bob Vila's ice dam article, calls the idea a common myth, though he says a clogged gutter can extend the area where a dam forms. Clean Energy Resource Teams (CERTs), a Minnesota clean energy organization, goes further: ice dams are not caused by roofing, ventilation or gutter problems, and the real problem is a home that leaks warm air.
Which fix for your house?
Start from what you can see; the sources for each row are in the steps below.
| What you see | Likely cause | First fix | Stopgap meanwhile |
|---|---|---|---|
| Snow melting high on the roof in freezing weather, ice along the eaves | Heat from the house warming the roof deck | Find the leaks, seal them, then insulate (steps 1 to 3) | Rake after each storm (step 7) |
| Dark, dirty patches in the attic insulation, or frost on it in cold weather | Warm, moist air leaking up through gaps under those patches | Seal those spots (step 2) | Rake after each storm |
| Attic insulation level with or below the tops of the floor joists | Too little insulation | Seal, then insulate to your zone's level (step 3) | Rake after each storm |
| Melt spots or ice above a bath fan, chimney, skylight or recessed lights | A local heat source or leak | Vent fans outdoors, seal and insulate around the source (steps 2 and 5) | Heat cable on the eave below it, kept at least 12 inches from any chimney or exhaust vent (step 8) |
| Gutters full of leaves, or packed with ice | Debris and ice spreading the dam along the gutter | Clean gutters and downspouts before the snow (step 6) | Keep them clear of snow and ice all winter (step 6); heat cable only once they are clean (step 8) |
| A vaulted (cathedral) ceiling with no attic to get into | Heat loss you cannot reach from above | An energy auditor or insulation contractor; or a vented second roof over the old one | Rake after each storm |
| Water stains on ceilings or walls along an outside wall, or water coming in | The dam is already leaking | Channel the dam or hire a steam pro, dry out, then fix the heat loss | None: see getting rid of an ice dam you already have |
How to prevent ice dams, step by step
Steps 1 to 5 remove the cause; steps 6 to 8 manage the symptom. Consumer Reports' advice is to do the corrective work once the weather warms up, before the next winter's dams form.
1. Find where the heat is getting out
Start with a home energy assessment. UMN Extension says the contractor you hire should run a blower door test to measure how airtight your ceiling is, and may use an infrared camera to find the places in the ceiling that lose the most heat. CERTs calls the assessment your first step and says your local utility, a nonprofit energy group or an HVAC professional can arrange one; many local utilities may offer rebates on it, ENERGY STAR adds.
To look yourself, ENERGY STAR's attic air sealing guide points to dropped soffits over kitchen cabinets and bath vanities, slanted ceilings over stairways, and the places where walls meet the ceiling, which can hide open cavities leading straight into the attic. Up there, dirty insulation shows where air is moving through it, and in cold weather frosty patches show where warm, moist air is condensing and freezing.
ENERGY STAR says to bring in a professional if you find knob and tube wiring, moldy or rotted rafters or joists, or kitchen, bathroom or dryer vents blowing moist air into the attic, and not to disturb vermiculite insulation (a lightweight, pea-size, flaky gray mineral that may contain asbestos) until an approved lab has tested it.
2. Seal the air leaks in the attic floor
Seal before you insulate. UMN Extension's first long-term action is to make the ceiling airtight so no warm, moist air can flow from the house into the attic, and only then to add insulation. ENERGY STAR says to call another contractor if one will not agree to seal first, and Building Science Corporation ranks airtightness ahead of insulation.
Plug the big holes first, ENERGY STAR says: open stud cavities where walls meet the attic floor, dropped soffits, and the spaces behind kneewalls in a finished attic. Its method: unfaced fiberglass batt folded into a 13-gallon garbage bag and stuffed into each cavity, then rigid foam board or reflective foil caulked over the soffit.
Then the smaller gaps: silicone or acrylic latex caulk for holes of 1/4 inch or less, and expanding spray foam for gaps of 1/4 inch to 3 inches, with fiberglass stuffed in first as a backer where the space around a plumbing pipe is wider than 3 inches. Seal around plumbing vent pipes and electrical wires, caulk around electrical boxes, and weatherstrip and insulate the attic hatch or door, or fit one of the off-the-shelf hatch covers ENERGY STAR mentions.
Flues and chimneys are the exception. Building codes usually require 1 inch of clearance from metal flues and 2 inches from masonry chimneys to anything combustible, including insulation. ENERGY STAR seals those gaps with aluminum flashing and high-temperature caulk, builds a metal dam to hold the insulation back, and says not to use spray foam there. Older recessed can lights get a specially designed cover sealed over them before any insulation goes on.
A tighter house comes with two safety checks. ENERGY STAR says that if a gas water heater, furnace or other fuel-burning appliance sits in the attic, a professional HVAC contractor should do combustion safety testing after any air sealing, and EPA recommends a radon test after you reduce air leaks; UMN Extension adds that combustion devices must still have enough air to operate safely. In the attic, walk on the joists or truss chords, never on the drywall between them.
3. Bring the insulation up to your zone's level
Measure what you have first. ENERGY STAR says that if the insulation is at or below the level of the floor joists you probably need more, and that the common types (fiberglass, cellulose and mineral wool) run about R-3 to R-3.5 per inch, so the depth in inches times 3 gives a rough R-value. Then add up to the level ENERGY STAR recommends for your climate zone, which you can find on the map on its recommended R-values page.
| Climate zone | Uninsulated attic: add | About this many inches (computed) | Already 3 to 4 inches: add | About this many inches (computed) |
|---|---|---|---|---|
| 1 | R30 | 8.6 to 10.0 | R25 | 7.1 to 8.3 |
| 2 and 3 | R49 | 14.0 to 16.3 | R38 | 10.9 to 12.7 |
| 4 to 8 (4A, 4B, 4C, 5, 6, 7 and 8) | R60 | 17.1 to 20.0 | R49 | 14.0 to 16.3 |
R-values: ENERGY STAR's levels for adding attic insulation to an existing wood-framed house. Inches computed as the R-value divided by 3.5 and by 3, ENERGY STAR's per-inch range. Check them against a quote; ENERGY STAR says the contractor must document how much was added and the new R-value.
The National Weather Service, Building Science Corporation and CERTs set floors from R-30 to R-50; we use ENERGY STAR's numbers because they are set by climate zone. If you use rolls instead of blown loose fill, ENERGY STAR says to buy unfaced ones so moisture does not get trapped, and old insulation can stay unless it is wet, moldy, smelly or contains animal waste. Watch the low edge above the outside walls: CERTs names thin insulation near the eaves as a contributing factor, and UMN Extension says that where space is tight, insulation with a high R-value per inch matters.
4. Keep the soffit vents open, and do not add powered vents
Ventilation helps once the leaks are sealed, not before. Building Science Corporation says adding vent openings to a leaky attic is likely to make the problem worse, and that ventilation may be beneficial once most leaks are sealed. UMN Extension says mechanical attic ventilation is not a recommended solution to ice dams in Minnesota, and CERTs says not to add roof vents, including powered vents.
Protect the airflow you already have. The National Weather Service calls good airflow from the soffits along the underside of the roof and out through the roof vents essential, and ENERGY STAR says every insulation estimate should include baffles (rafter vents) so the new insulation does not block the soffit vents. Bob Vila's article calls designing an attic ventilation system a job for a qualified roofing professional.
5. Get heat sources out of the attic
Anything warm above the insulation melts snow. UMN Extension names kitchen and bathroom exhaust that ends just above the roof, heat from the chimney when a wood stove or fireplace is in frequent use, and leaky or poorly insulated ductwork in the attic. ENERGY STAR lists kitchen, bathroom or dryer vents that exhaust into the attic instead of outdoors as a reason to call a professional, and Bob Vila's article says to have bathroom and dryer vents rerouted from the attic out through an exterior wall.
Ducts that have to stay in the attic should be sealed first and then can be buried in insulation, which ENERGY STAR says is fine and can even improve efficiency.
6. Clean the gutters and downspouts before the snow
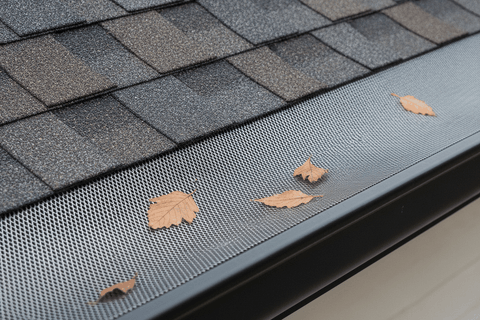
Clear the leaves, sticks and other debris out of your gutters and downspouts in the fall so melting roof snow can flow into the gutters and down the downspouts, then keep them clear of snow and icicles all winter, as the National Weather Service advises. This will not stop an ice dam on its own, but a clogged gutter gives the ice more room to spread.
Our gutter guard guide and gutter cleaning tools guide cover keeping them clear. Do it before the ice arrives: Consumer Reports says few outdoor home repairs are as dangerous as working on a ladder resting against an icy gutter. If you have heat cable, the cable makers say to clear leaves, pine needles and other combustible debris off the roof and out of the gutters before each season.
7. Rake the roof after every heavy snow
A roof rake lets you pull snow off the roof from the ground, removing one of the things an ice dam needs. Rake right after a storm while the snow is still soft, and take as much as you can safely reach from the ground: Kuhl warns that clearing only the bottom few feet can start a second ice dam higher up, right where you stopped. Travelers' ice dam steps start with raking the first 3 to 4 feet from the edge.
Choose a rake with wheels or rollers: IBHS says wheels keep the blade above the roof covering to minimize scraping, and UMN Extension warns that a roof rake can damage roofing. Watch your footing, keep people 10 feet back from where snow is expected to fall (OSHA's guidance for roof snow crews), and do not stand directly beneath icicles, as Travelers warns. Keep the pole at least 10 feet from any power line (OSHA's minimum) and away from where the lines enter the house, as IBHS advises. For the snow that lands below, our best snow shovels guide picks a shovel or a pusher by job.
How much roof a pole reaches depends on the height of your eaves; our roof rake guide works it out and compares six rakes. Amica suggests a roof rake from the ground on a one-story home; where the roof is not reachable from the ground, Amica and CERTs both say to hire a snow removal pro rather than climb a ladder. Stay off the roof itself: UMN Extension warns that anyone on the roof in winter, or working on it from below, risks injury, and OSHA's investigations found that falls cause the most worker deaths and injuries during rooftop snow removal.
8. Add heat cable only where the ice keeps coming back
Heat cable (also sold as heat tape or roof and gutter de-icing cable) does not fix the cause; it keeps a path open so meltwater can drain from the roof to the ground. It clips along the roofline in triangles that reach up past the overhang into the warmer part of the roof, and runs through the gutter and downspout. Frost King's manual says not to install it to remove ice dams that have already formed, and IBHS says cables will not remove an ice dam but will create channels that let the water drain off safely.
Sources disagree on whether to install it at all. CERTs says do not, because heating cables shorten the life of the roof and add to energy costs, while IBHS backs professionally installed cable that is UL Listed, FM Approved or CSA Certified, and Kuhl recommends self-regulating cable, which only switches on at 40 degrees F or below and lasts longer. Bob Vila's article adds that self-regulating cable typically needs a professional to install it, and that the constant-wattage kits sold at most home improvement stores will work in a pinch. Our read: cable is a reasonable stopgap on the stretch of eave where ice returns every winter, after the attic work, not instead of it.
Size a plug-in kit with the maker's formula, because the cable cannot be cut, spliced or altered. Frost King's manual multiplies the length of roof edge by an overhang factor (4.0 for an overhang of 12 inches or less with a gutter, 5.3 for 24 inches), adds twice the length of each downspout and 6 feet per valley, and says to choose the longer kit when your total falls between sizes. Its kits run from 20 to 240 feet, and Frost King rates the 30 to 200 foot kits at 5 watts per foot on 120 volts.
| Example roof | Frost King formula | Cable needed | Kit | Watts (computed) | Energy per 24 hours on (computed) |
|---|---|---|---|---|---|
| 30 ft of eave, overhang 12 in or less, gutter, one 10 ft downspout | 30 x 4.0 + 10 x 2 | 140 ft | RC-160 | 800 | 19.2 kWh |
| 25 ft of eave, 24 in overhang, gutter, one 10 ft downspout | 25 x 5.3 + 10 x 2 | 152.5 ft | RC-160 | 800 | 19.2 kWh |
| 40 ft of eave, overhang 12 in or less, gutter, one 10 ft downspout | 40 x 4.0 + 10 x 2 | 180 ft | RC-200 | 1,000 | 24 kWh |
Formula, multipliers and kit sizes: Frost King's Model RC manual (Appendix B). Watts = kit length x 5 watts per foot; energy = watts x 24 hours / 1,000. Our example roofs, not measurements of real houses.
So a typical 30 to 40 foot run of eave with one downspout needs a 160 or 200 foot kit drawing 800 to 1,000 watts, about 19 to 24 kWh a day if left on around the clock. Frost King's advice is to plug the kit in before the snow begins and unplug it once temperatures rise above freezing, and its manual warns that running the cable in warm weather can overheat it. For problem areas far apart, the manual suggests a separate cable for each.
The Frost King and EasyHeat manuals set strict rules and warn that breaking them can result in injury or death from electric shock or fire. They require a 120 volt outdoor receptacle that is grounded, ground-fault protected, on a circuit with the right amp rating, switched with a pilot light, protected from the weather and within 6 feet of where the cable starts on the roof, and both recommend against an extension cord. The heated cable must never touch, cross over or overlap itself, leaves and needles must be kept off it, and it must not be attached to wooden parts of the eave. Both manuals say not to install it where it might be warmed by an exhaust vent or chimney, and to keep it at least 12 inches from those sources of heat. If you have gutter guards, both manuals require at least 1/2 inch of clearance between the guard and the cable. Both kits are made for inclined roofs with noncombustible tab shingles such as asphalt and for metal or plastic gutters and downspouts, and Frost King says its kit is not made for metal roofs. If your outlet does not meet the requirements, the manuals say to check with your local electrical inspector or a licensed electrician. Rake carefully once cable is up: Bob Vila's article notes that raking can dislodge clip-on cable.
How to get rid of an ice dam you already have
Start inside. Consumer Reports says to move valuables out of the way the minute you see a leak; Amica says to clean up standing water first, then damp surfaces, and that a wet vacuum and dehumidifiers speed the drying. UMN Extension says not to repair ceilings and walls until they are dry, and to do the repair together with fixing the heat loss that caused the dam, or the damage will happen again.
Outside, the goal is a channel through the dam so the water behind it can drain. Two methods are published:
- Tap water. UMN Extension says hosing with tap water on a warm day will make channels through the dam, working upward from its lower edge. The channels stop working within days, so this is only a temporary fix.
- Calcium chloride in a stocking. Travelers, Hanover and Bob Vila's article all describe filling a nylon stocking (the article says tube socks or pantyhose legs) with calcium chloride ice melt and laying it vertically across the dam so it melts a channel through the ice. The article lets the end hang an inch or two over the roof edge and figures a 50 pound bag fills about 13 to 15 tube socks. Travelers rakes 3 to 4 feet of snow off the edge first and covers the shrubs and plants below with lightweight tarps while the stockings are in place, because the runoff may damage them. New snow or rain can refill the channels. Our ice melt guide covers calcium chloride products.
Use calcium chloride only: Travelers says rock salt or sodium chloride can damage your roof, and Bob Vila's article says rock salt can damage shingles and its runoff can kill the plants below. Do either method only if you can reach the edge safely; Travelers and Hanover both say that if you cannot, hire a contractor. Consumer Reports' advice is not to try to remove an ice dam yourself at all, and it notes that hundreds of homeowners end up in emergency rooms each year after trying.
Do not hack at the dam. CERTs says not to remove ice with chippers, chemicals or heat, which can damage shingles, gutters and other parts of the house, and to hire an ice dam removal service that uses steamers if water is already coming in. Kuhl says it is almost impossible to break an ice dam up with a hammer, especially safely, and Bob Vila's article says never to use an axe or hatchet on it. Building Science Corporation notes that people die every year when big ice dams fall on them or when they fall off roofs trying to get rid of them. Steam is the professional method: a roofing company clears the snow, then steams channels through the dam with commercial equipment that heats water and sprays it under pressure.
Ice and water shield: what your roofer adds at reroof time
Ice and water shield is a self-adhering underlayment under the shingles along the eaves. Because it goes on in place of normal underlayment (the building code's words), it comes with a new roof, not as an add-on. Building Science Corporation recommends a self-sealing waterproof layer at the eaves of all sloped roofs as backup, since even well built roofs can dam from solar melting, running far enough up the roof to hold back 6 to 8 inches of water above the edge of the wall insulation below.
Section R905.1.2 of the 2021 International Residential Code requires an ice barrier where Table R301.2 designates a history of ice forming along the eaves, for asphalt shingles and several other roof coverings. It runs from the lowest edges of the roof to a point at least 24 inches inside the exterior wall line of the building, and on roofs of 8 in 12 or steeper, at least 36 inches up the slope from the eave edge. At reroof time, ask what your local code requires and how far up it will run. It limits what water behind a dam can do; it does not stop the dam.
Tools for this job
Six things this guide reaches for, from the attic floor to the eaves. The foam and the stair cover serve the real fix in step 2; the rake, gutter guard, cable and calcium chloride are the stopgaps. If you run heat cable with a gutter guard, the cable makers require at least 1/2 inch of clearance between them.
Avalanche! 500 Roof Snow Removal System
The best overall pick in our roof rake guide for one-story shingle roofs: four fiberglass sections make a 15.5 foot pole, and 1.5 inch wheels carry the 12 foot slide over asphalt shingles so the snow slides to the ground while you stand below.
Check price on AmazonFrost King RC160 Roof and Gutter De-Icing Cable Kit, 160 ft
A pre-assembled 160 foot constant-wattage kit rated 800 watts at 120 volts, for shingle roofs only; plug it in before the snow and unplug it above freezing, size it with the formula in step 8, and use only a grounded, ground-fault protected outdoor outlet, as the manual requires.
Check price on AmazonRaptor Stainless Steel Micro-Mesh Gutter Guard, 48 ft
Stainless steel micro-mesh that keeps leaves, pine needles and roof grit out of gutters 5 inches or smaller, so the gutter is clear for meltwater before the first snow; it is the best overall pick in our gutter guard guide. If you also run heat cable, the cable makers require at least 1/2 inch of clearance between the guard and the cable.
Check price on AmazonPeladow Calcium Chloride Pellets, 50 lb
Calcium chloride pellets, the melter Travelers, Hanover and Bob Vila's article name for the stocking method instead of rock salt; the article figures a 50 pound bag fills about 13 to 15 tube socks.
Check price on AmazonGreat Stuff Big Gap Filler Foam Sealant
Expanding foam that its listing says fills, seals and insulates gaps up to 3 inches, the top of ENERGY STAR's 1/4 inch to 3 inch range for spray foam around plumbing vent pipes and wires in the attic floor; never around a flue or chimney, where ENERGY STAR says to use flashing and high-temperature caulk.
Check price on AmazonEnergy Wise Attic Stairs Insulation Cover
A zippered cover for pull-down attic stairs that fits openings up to 25 by 54 by 11 inches; ENERGY STAR says to weatherstrip and insulate the attic hatch or door, or use an off-the-shelf cover like this one.
Check price on AmazonCommon questions
Do heat cables prevent ice dams?
They keep a channel open for meltwater along the stretch they cover, but they do not remove the cause, and Frost King's manual says not to install them to remove ice dams that have already formed. Use them on the problem stretch after the attic work, not instead of it.
Does homeowners insurance cover ice dams?
Usually the damage, not the removal. Allstate says dwelling coverage may help pay to repair damage from an ice dam, but your policy likely will not pay for services to remove the ice dam, and personal property coverage typically does not cover belongings damaged by one. Progressive says ice dam removal is generally not covered and that damage from gradual deterioration or lack of maintenance typically is not either. Amica says that when an ice dam lets water into the home, those repairs are generally covered. Policies vary, so read yours and ask your insurer.
How much snow should you rake off the roof?
As much as you can safely reach from the ground. Kuhl warns that stopping after the bottom few feet can form a second ice dam where you stopped.
Should you add roof vents to stop ice dams?
Not before the air leaks are sealed; Building Science Corporation says added vents in a leaky attic are likely to make the problem worse. Keep your existing soffit vents clear with baffles when you insulate.
Can you put rock salt on an ice dam?
No. Travelers says rock salt can damage your roof; the published method uses calcium chloride ice melt in a nylon stocking, with the plants below covered by a tarp.
Are icicles a sign of an ice dam?
Not always. Travelers says icicles confined to the gutters with no water trapped behind them likely mean no ice dam has formed, though icicles can be a precursor; Hanover says they mean the conditions for one are present. Water stains or moisture along the ceiling of outside walls may mean a dam has formed and water has got through the roof, Travelers adds.
The bottom line
Fix the attic first: seal, insulate to your zone's level and keep the soffit vents clear. Then the roof: rake after storms, keep gutters clean and cable the worst stretch of eave, with a stocking or a steam pro for the day water comes in. For the rest of the winter kit, our guide to snow removal tools covers the shovels, blowers and ice melt for the ground below. For the steps and walks, our best electric snow shovel guide compares battery shovels that throw the snow aside. When the drive is too long to shovel, our best snow blowers guide sizes a machine by drive length and snowfall.
We are Spear Head Spade, and what we make is digging tools: double-patented spades, with over 600,000 sold. None of them belongs on a roof. When the snow is gone and the ground softens, our spade finder matches a spade to the soil you will be opening in spring.
Disclosure: some links in this guide are affiliate links to Amazon. This is at no extra cost to you, and it never changes our honest, use-based recommendations.