As an Amazon Associate we earn from qualifying purchases. Some brands also pay us when you click or buy, so those links are ads. Full disclosure below
Clean garden tools at the end of the season in four passes: knock off the soil, wash and dry the steel, take rust off with steel wool or a vinegar soak, then sharpen what needs it and oil everything before it goes on the wall. One afternoon in fall, and the tools work in spring.
This is the long version of step nine in our garden winterizing checklist: one afternoon of unglamorous work that decides whether spring starts with digging or with a trip to the hardware store.
How to clean garden tools
How to clean garden tools comes down to four passes, and doing them in order makes every later step easier. Rust needs moisture and bare steel, and dried soil holds both against the blade all winter. Do the full version at the end of the season and a quick version after heavy digging.
1. Knock the soil off while it is still damp
Scrape the blade with a putty knife, a stiff brush, or the edge of another tool. Damp soil comes off in one pass; dried on, it becomes a shell. Check the inside curve of the blade and the socket where it meets the handle, where soil stays wet longest.
2. Wash the steel
Hose the tool down and scrub with a stiff brush and warm soapy water. Skip the pressure washer on wooden handles and pivot joints, since it drives water into both. Sap on pruner blades comes off faster with rubbing alcohol than with scrubbing. For hosing tools down, our garden hose guide picks a hose for every kind of yard and a metal nozzle to go on it.
3. Dry everything completely
Towel the steel dry, then leave the tools in the sun or a dry garage for an hour before hanging them. It is the step people skip, and the reason they spend April fixing rust. Wooden handles need to dry too, especially at the socket.
4. Disinfect pruners after cutting diseased plants
Wipe the blades with 70 percent isopropyl alcohol, which works on contact and does not corrode steel the way household bleach does. Do it between plants when you are cutting a known problem such as fire blight, and again before storage.
How to remove rust from garden tools
How to remove rust from tools depends on which kind you have. Surface rust is a chore: an orange film that comes off with abrasion in a few minutes. Deep pitting is a decision about whether the tool is worth keeping. Most garden tool rust is the first kind.
1. Start with steel wool or a wire brush
Medium coarse steel wool, grade 2, takes surface rust off flat steel quickly and leaves the metal bright. A stainless wire brush does the same on rough castings and inside curves. Work along the length of the blade rather than across it, and leave the powder coated faces alone; away from the edge, that coating is what protects the steel.
2. Soak heavy rust in vinegar overnight
For rust that will not brush off, submerge the metal head in plain white vinegar overnight, up to twenty four hours. Soak the head only, and keep wooden handles clear of the bucket, because the wood swells and grays. Check the steel after a few hours the first time: vinegar keeps working on good steel once the rust is gone, and a long soak leaves thin steel etched and dull gray.
3. Neutralize, scrub and dry
Rinse the tool, wipe it with a tablespoon of baking soda in a cup of water to stop the acid, then rinse again. Scrub the loosened black residue off with steel wool. Dry it completely, towel first, then sun or a fan. Bare steel out of an acid bath flash rusts within the hour if you leave it wet.
4. Oil the same day
Wipe a light film of oil over every bare surface as soon as the tool is dry. Stripping rust strips whatever protection was left, so a de-rusted tool left dry comes back worse than it started. Camellia oil, 3 in 1 oil, or any light machine oil works. Skip used motor oil, which is a disposal problem.
How to sharpen garden tools
Sharpening a garden tool is not knife sharpening. You are restoring a working edge on steel that meets dirt and rock, not putting a polish on it. Match the file to the bevel the tool already has, and stop when the edge is even.
| Tool | Edge to keep | What to use |
|---|---|---|
| Hoe | The bevel it came with, on the leading face | 10 inch mill file |
| Digging shovel, edger | Blunt bevel, roughly the angle it came with | 10 inch mill file |
| Loppers, hedge shears | Factory bevel, outside face only | Mill file or a coarse diamond stone |
| Bypass pruners | Narrow bevel on the outside of the cutting blade | Fine diamond or ceramic stone |
| Pruning saw | Set and hardened teeth | Nothing, replace the blade |
| Spear Head Hoe | Either long side, wear garden gloves | Knife sharpener or metal file |
| Spear Head Spade | Factory 35 degree bevel, tip to tail | Nothing |
Hoes, shovels and loppers: a mill file at the existing bevel
Clamp the tool in a vise or brace it against a bench so it cannot move. Hold a 10 inch mill file at the angle the bevel already sits at and push it along the edge in one direction only, away from your body. A file cuts on the push stroke, so dragging it back and forth dulls the file and rounds the edge. Six to ten passes is usually enough. A file with a handle is worth the few extra dollars: a bare tang slips when the file catches. An axe bit takes the same treatment at a blunter angle, and our splitting axe picks cover which heads come ready to swing and which want a file before the first cord.
Pruner blades: a diamond or ceramic stone
Bypass pruners have one cutting blade and one flat hook, and only the cutting blade gets sharpened, on its outside face only. Working the inside face opens a gap, and the pruner starts folding stems instead of cutting them. A mill file handles loppers and hedge shears, but a pruner's bevel is small enough that a stone gives more control. Use a fine diamond or ceramic stone, follow the curve of the blade, and keep the pressure light. Our guide to the best pruning shears covers replacements.
What not to sharpen
Some edges are meant to be left alone: hardened saw teeth, serrated blades, and any factory edge in steel too hard for a file. A chainsaw chain is the exception among saws: it is filed with a round file sized to its pitch, and our best chainsaw sharpener guide covers the tools for it. A hori hori knife carries both kinds of edge, a straight one for a whetstone and a serrated one to leave alone until it rounds over, and our hori hori knife care section covers each.

The Spear Head Spade is the clearest example. Every blade is pre-sharpened at the factory to a 35 degree bevel along the entire edge, tip to tail, and it never needs sharpening: the powder coat is designed to wear away gradually and keep exposing that factory edge, so the more you use it, the sharper it gets. The steel is tempered carbon-manganese, 33 percent thicker and 25 percent harder than standard shovel stock, and a regular file will not touch the steel. If the spade in your shed is a soft steel big-box shovel, file it. If it is this one, clean it and hang it up.
The one tool of ours you do file: the Spear Head Hoe
The hoe head is stainless steel, which is much softer than carbon-manganese steel, so the file advice does stand for it. If the edges get nicked by rocks or pebbles, run a simple handheld knife sharpener or a metal file down either long side and it should bring the edge right back. Wear garden gloves when you do it. Storage matters more for the hoe than for the spades: we added carbon to the stainless steel to increase durability, so it will develop a surface rust if exposed to rain or moisture for an extended period of time. To avoid this, simply store it in your shed or garage after use. Our guide to garden hoe types and uses sorts out which shape you own.
Oil and handles
Steel and wood want different oils. On steel, use a light oil that does not gum up. Camellia oil is the traditional choice; 3 in 1 oil or any light machine oil does the same job. Wipe on a thin film, wipe the excess off, and store. Heavy grease traps grit against the steel.
On wood, use boiled linseed oil. Sand a rough or gray handle lightly with 120 grit paper, wipe the dust off, and rub the oil in with a rag. Two thin coats a few hours apart beat one thick coat, which stays tacky for days.
One safety note: rags soaked in linseed oil generate heat on their own as the oil cures, and they have started fires in closed garages. Spread them flat outdoors until they are stiff and dry, or seal them in a metal can with water.
Replace a cracked handle rather than taping it: a split running out of the socket will finish splitting under load. Fiberglass and steel reinforced handles need no oil, just a wipe and a check for play where the head meets the shaft.
Garden tool storage ideas
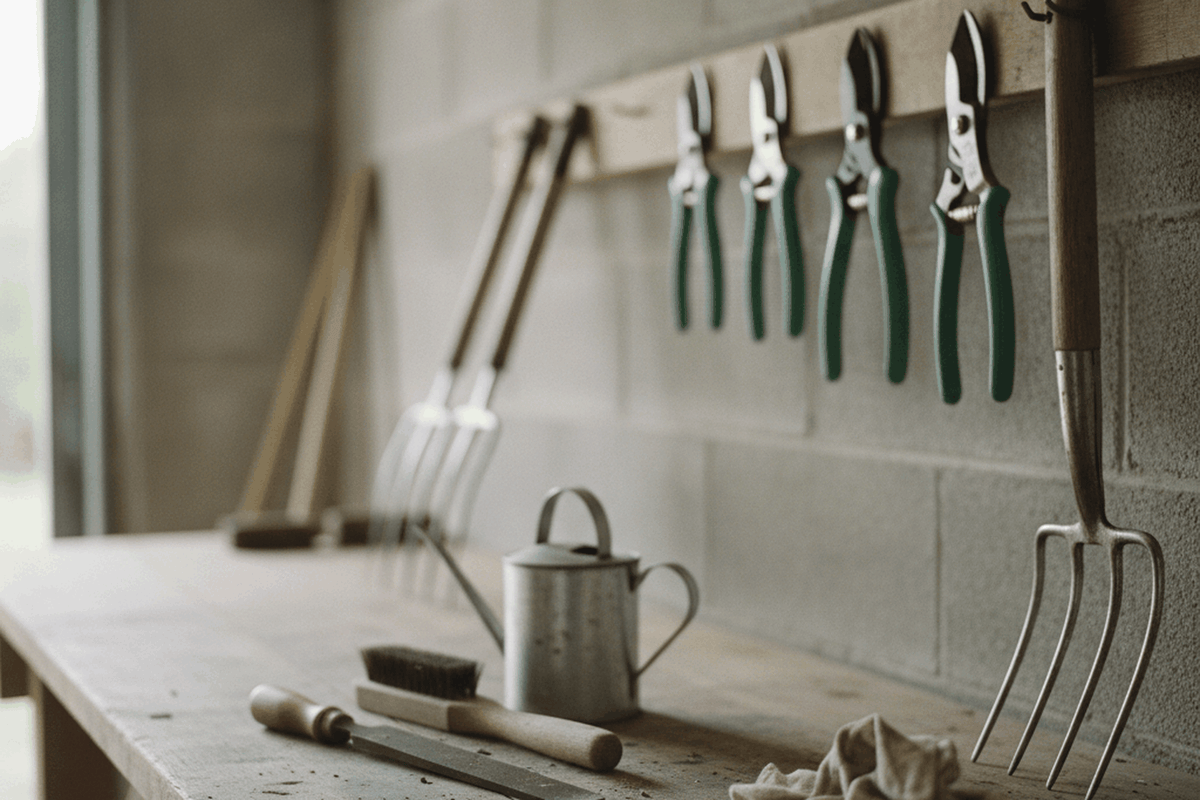
Most garden tool storage ideas come down to two rules: keep the tools dry, and keep the steel off the floor. Concrete wicks moisture, and a shovel standing in a corner sits in whatever runs under the door. Wall storage solves both at once, and our garden tool storage ideas sort the racks and rails by space. In winter the snow shovel earns a hook by the door too, and our best snow shovel guide picks one by job. A gas snow blower needs garage floor space rather than a hook, and our best snow blowers guide covers its fall fuel and oil routine.

A wall rail with adjustable hooks is the best answer for long tools. A 48 inch rail holds most of a garden's rakes, shovels, hoes and brooms in one row, and shows you at a glance what did not get put back. The cheap version is a two by four with lag screw hooks.
If you would rather not build one, we sell a ready-made rack: the HangThis Up Stud-Mount Garden Tool Rack, a pair of predrilled boards in 7-layer cabinet-grade birch plywood that screw into the studs and hold long-handled tools across the wall. The 36 in size holds 7 long-handled tools, and the fasteners and drive bit come in the box. HangThis Up makes and ships it, and we sell it on our site.
A pegboard suits the small stuff: pruners, trowels, gloves, twine, a hand rake. Draw an outline around each tool with a marker and the board tells you what is missing.
A bucket of sand is a classic and a partial answer. Fill a five gallon bucket with builder's sand, work about a quart of light machine oil through it, and plunge a blade in a few times at the end of a working day. It scrapes soil off and leaves a film, but it does not replace a proper clean and dry. Dump the sand every couple of years.
Hang long handled tools head up or head down, as long as the head is not resting on the ground. Indoors and unheated suits almost every tool, and anything holding a battery or water goes somewhere that does not freeze. A battery snow shovel's pack is one of those, and our best cordless snow shovels guide covers where to keep it between storms.
Tools for this job
The five things the whole routine runs on, plus the one tool in the shed that never needs the file.
Crescent Nicholson 10 inch mill bastard file with handle
One 10 inch mill file covers hoes, shovels, edgers and loppers, and this one comes with a handle so the bare tang is not a spike in your palm.
Check price on AmazonKurobara Tsubaki camellia oil, 3.4 oz
Light, non-gumming plant oil for steel blades and pivots before storage; a few drops on a rag coats a whole shed of tools.
Check price on AmazonRhodes American steel wool, medium coarse grade 2, 12 pads
Grade 2 steel wool takes surface rust off flat steel in a few minutes and leaves the metal bright enough to oil the same day.
Check price on AmazonUUP 48 inch wall mount tool organizer with adjustable hooks
One 48 inch rail with adjustable hooks gets every long handled tool off the concrete and onto the wall, which is most of what tool storage is.
Check price on AmazonSunnyside boiled linseed oil, quart
The standard finish for wooden tool handles because it cures instead of staying tacky, and a quart lasts years at two thin coats per handle.
Check price on Amazon
Spear Head Spade D-handle garden spade
The one tool on this list you never sharpen: pre-sharpened at the factory to a 35 degree bevel tip to tail, with a powder coat designed to wear away and keep exposing that edge.
Common questions
Can you use WD-40 on garden tools?
Yes, for what it actually does, which is displacing water and freeing a stiff pivot. It leaves a light film rather than a durable coating, and that film thins out over the winter, so a tool sprayed in October is not protected in March. Break the rust loose with it, then oil the tool for storage.
How often should you sharpen a hoe?
Once or twice a season for most gardeners, plus a few passes with a file any time it starts skidding across weeds instead of slicing them. Rocky soil dulls a hoe faster than clean beds do. A sharp hoe cuts weeds at the root with a push, and a dull one drags them out by the tops.
Does vinegar damage tools?
It can if you leave them in it. Vinegar is a mild acid that keeps working after the rust is gone, so a long soak etches good steel and will attack paint and powder coating. Limit soaks to overnight, keep them to bare rusty metal, neutralize with baking soda solution, and oil the tool the same day.
How do you store garden tools in a small space?
Go vertical and use the wall behind the door. A rail or a few heavy hooks on one strip of wall holds every long handled tool in about two feet of floor space, and a pegboard takes the hand tools. With no wall to spare, a tall garbage can keeps handles upright and heads off the concrete.
How do you keep tools from rusting in a shed?
Control the moisture and cover the steel. Store tools clean, dry and lightly oiled, hang them off the floor, and leave air moving around them rather than packing them into a closed bin. A container of desiccant helps in a damp shed. Most shed rust starts with tools put away wet in the fall.
The bottom line
Tool care is four habits and one afternoon. Get the soil off before it dries, dry the steel, oil anything bare, and hang it where air can reach it. Sharpen what needs an edge with a mill file at the bevel it came with, use a fine stone on pruner blades, and leave the ones that were built sharp alone. Ours is a double-patented spade with over 600,000 sold, and it winters like everything else: clean, dry and on the wall. If something did not survive the season, our guide to the best shovels for digging is where to start.
Disclosure: some links in this guide are affiliate links to Amazon. This is at no extra cost to you, and it never changes our honest, use-based recommendations.